Showing posts with label Mixed Media Canvas. Show all posts

Tuesday, March 24, 2015

hummingbird and willow flower on monotype fabric background with trisha too

Well, you can see I'm not feeling particularly creative today with the title, but at least you know what you're going to find, right?  First let me show you the crackle--I do love a nice texture, and this effect is on all the chipboard in this "canvas":
Pretty, right?  It's several color of metallic paints, with a rose antiquing cream over the crackle finish, all from DecoArt.  
The background is a monotype print on a piece of cotton fabric, created using a Gelli plate with SoSoft fabric paints, and adhered to the cover of an old book:
The sentiment stamp is from Red Lead . . .
Here is a close up of the Wildwood Flower--I was impressed how the laser cut detail still showed, even after two layers of paint, a layer of crackle finish, and the antiquing cream!

You'll find the Hummingbird HERE
The large Wildwood Flower HERE
The smaller Willow Flower HERE  (this one was trimmed a little--don't be afraid to cut your chipboard to fit your project)

Thank you for stopping by the Leaky Shed Studio today! 
:)trisha

Sunday, February 15, 2015

Fairy Doll Canvas with Julie Nutting Chipboard


Hi, Veronica here today to share with you my latest mixed media canvas.  I layered and used lots of paints, sprays, paste, markers, etc.

Today I am using the Julie Nutting chipboard doll and new willow flower to make a cute Fairy Doll Canvas. In order for my my doll to look like a fairy I added the Leaky Shed Studio Large Spring Butterfly wings.


I have lots of photos today to show you my process from start to finish.  I first prepped my canvas with a layer of gesso then strips of G45 fairy paper.


For the butterfly wings I first painted it with Gesso, then I brushed some Art Anthology "Amber" gemstone sorbet and last I covered the wings with BoBunny Gold Glitter paste.


For my process of how I prep my canvas for my chipboard and the step by step photos of layering my embellishments please see my blog.


Thank you for stopping by, Veronica (kitsnbitscraps)


Please go on over to my blog HERE for photos of my process of how I embellished my canvas.  There is also a complete list of products I used besides my main Leaky Shed Studio chipboard.

Leaky Shed Studio Product Used;


Wednesday, December 18, 2013

Julie Nutting Classy Mixed Media Canvas

Hi everyone, welcome to the Leaky Shed Studio blog! I recently shared a Julie Nutting Princess Canvas I created using the Princess 8" Doll that I made as a Christmas present for my niece. At that time, I mentioned that I would be sharing a second canvas I made for my other niece. I used many of the same techniques to create this canvas as I did my first one and if you are interested in a detailed tutorial you can visit my blog 17turtles.

Julie Nutting Beautiful You Canvas by Juliana Michaels

This canvas was created using the Julie Nutting Classy 8" along with the Ring Frame Large.  I once again painted the frame using a Krylon Silver Leafing Pen and then added glitter to the edges for some extra shimmer and bling.

Julie Nutting Beautiful You Canvas by Juliana Michaels detail

I love playing and creating with these dolls, especially the 8" dolls. Because they are larger in size than the 4" dolls, they are a little easier to work with. I once again created a paper pieced dress from patterned paper using the tutorial I have posted on my blog.

Julie Nutting Beautiful You Canvas by Juliana Michaels detail

As I created both of these canvases, it reminded me of how much I used love playing with my dolls when I was a little girl. I think, I still have a bit of that little girl inside me who loves to play with her dolls!
 Julie Nutting Beautiful You Canvas by Juliana Michaels detail

It is so much fun to add the little details...all the way down to her silver shoes.

Thanks so much for stopping by today!
HUGS,

Leaky Shed Studio Supplies:

Friday, December 13, 2013

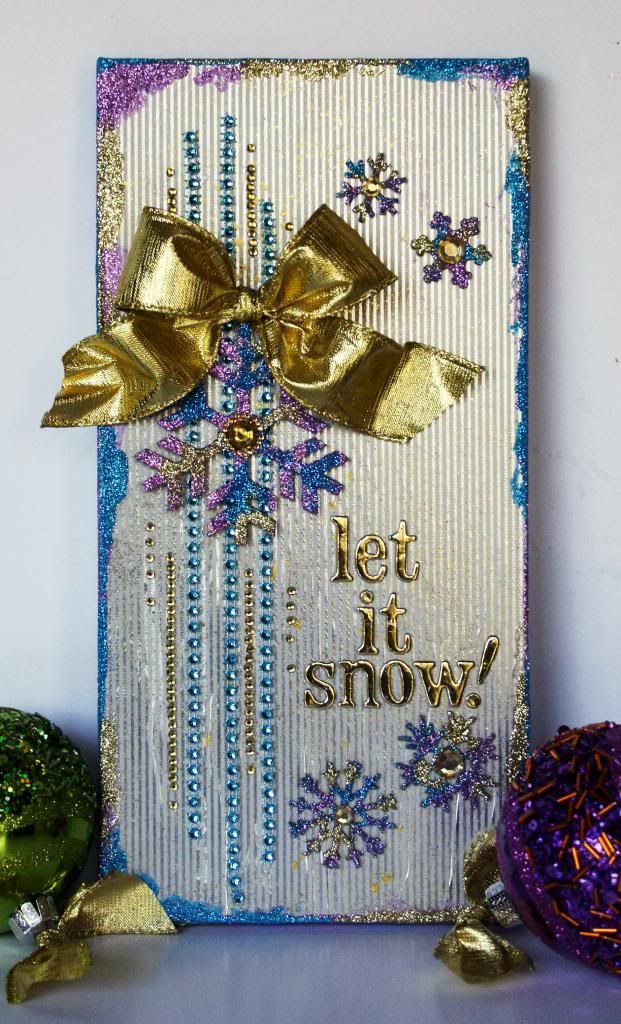
Let It Snow Canvas

Hi everyone!  It's Robbie today with a little canvas that I made using some of the new Winter release chipboard pieces.

Let It Snow

I have been into purple and blue lately because my daughter's apartment is decorated primarily in purple, blue and gold.  I love these non traditional colors for Christmas projects and especially for winter projects.


The background of this 6x12" canvas is covered with a  piece of wrapping paper.  I just used Mod Podge to adhere it, then gave it a light mist of Color Shine.  The paper is silver and white, but I knew that I wanted to add gold as the primary metallic color.

I really love the idea of using wrapping paper for things that will sit out during the holidays.  In my case, I only buy what I love and what co-ordinates with my decor.

Tip:  Ok... weird tip for today!  If you want AWESOME wrapping paper, try TJ Maxx, Marshalls or Home Goods.  They are all owned by the same company and they have the BEST foil papers!!   They are also really inexpensive compared to buying them at other stores.  :)


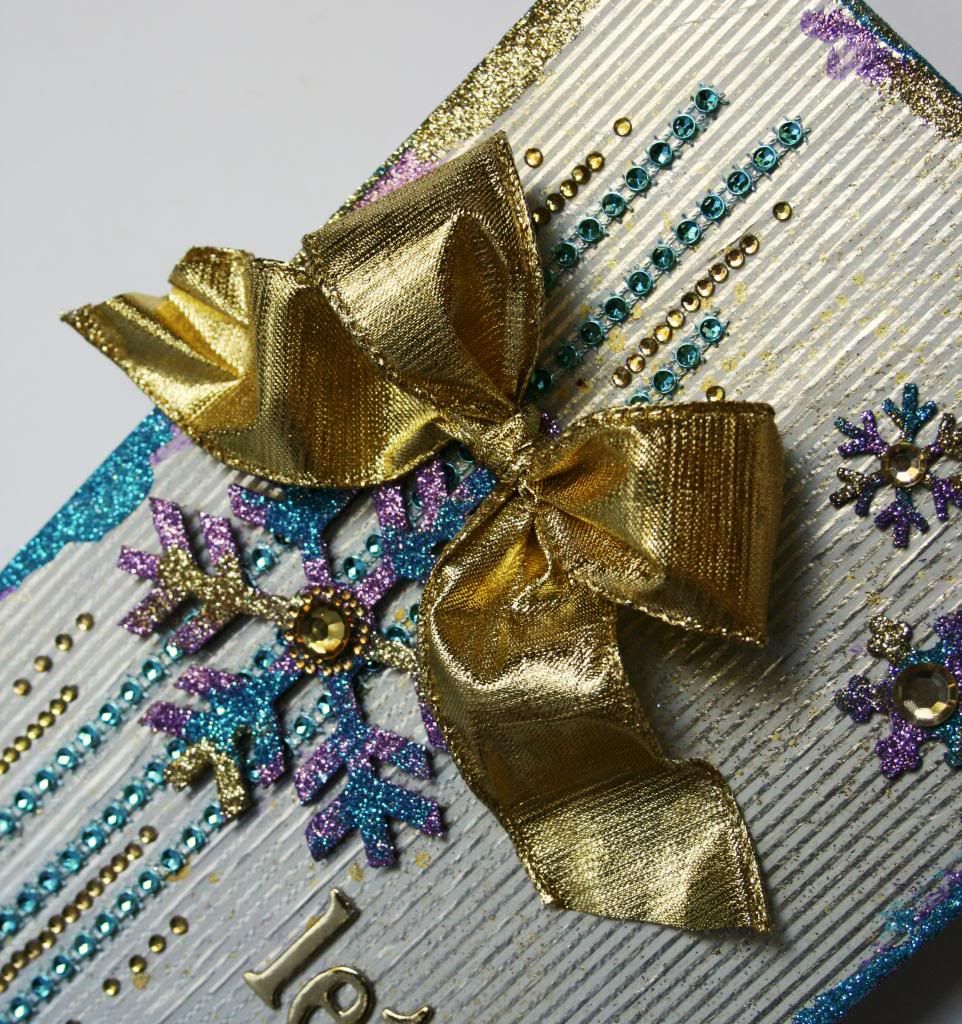
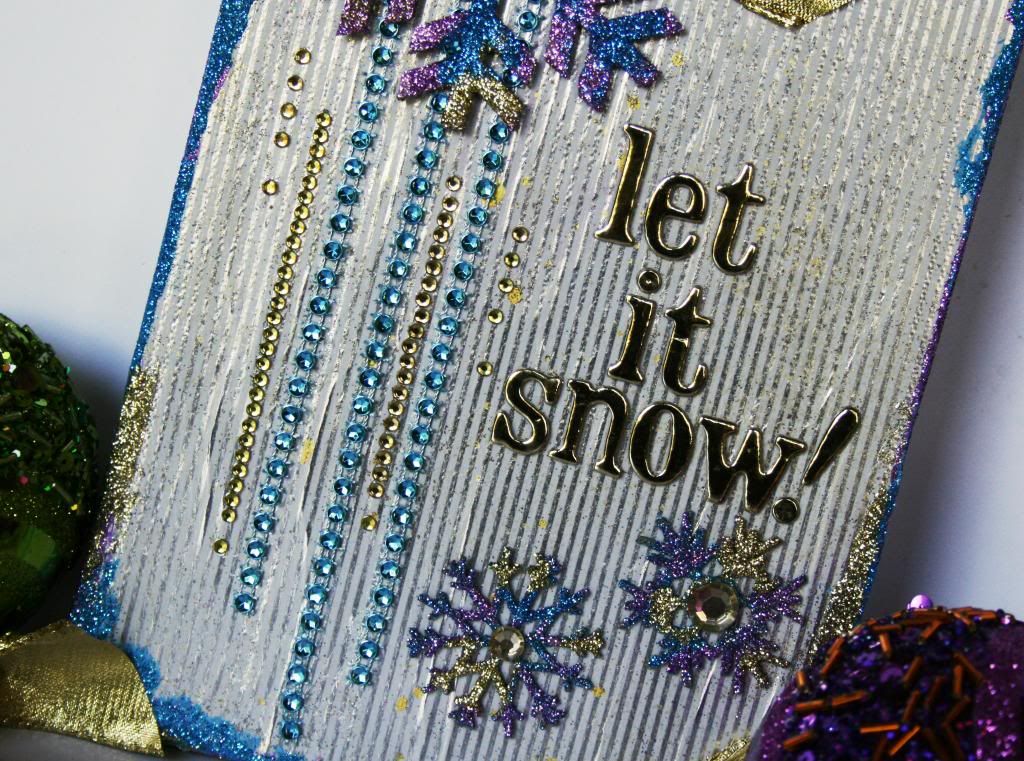
You can see in the close-up that this is a really glittery project!  Be prepared to get covered!  

I first put purple glitter on the entire snowflake.  After it was dry, I just took my paint brush and dabbed in a few places with glue and added the blue glitter.  Repeat the same process for the gold glitter.

I also did the edges the same way.  I did use purple paint, but decided that the glue worked better.  


For the bling in the background, I just glued the blue trim down and then added adhesive jewels.   I also added some jewels in the center of the snowflakes.  

Finish the project off with a sentiment and a bow.  Actually a really easy and quick little sign to set out during the winter.  

Tip:  Since I am giving shopping tips for this post, I thought I would let you know that I picked up the trim at Michaels for $1.   They have several colors in the $1.50 spot, but always dig a bit in the dollar ribbon bin.  You never know what you might find.

Of course, while you are shopping make a stop by the Leaky Shed Store!

Supplies Used:
Six Snowflakes 907-42 
Snowflake Ornament

Thanks for stopping by and be sure to check us out on Facebook and share your creations!