Showing posts with label Scrapbook Layout. Show all posts

Tuesday, March 31, 2015

Sweet Baby Layout with Veronica (kitsnbitscraps)


Hi, its my turn today and I am sharing a Sweet Baby layout that I did using Leaky Shed Studio "Baby", and also Swirl Vine Corner.

I normally do not work with blank space but decided to go ahead and do something different.  The cute "Humpty Dumpty" is hand drawn and pieced together, along with the crowns.


For my main title I used "Baby"; then I used the "Swirl Vine Corner" which I cut in half and used on my page.


For more photos of my process and techniques used to create this layout please visit my blog "Kitsnbitscaps"

Thank you for stopping by ...
Veronica (Kitsnbitscraps)


Leaky Shed Studio Product Used:


Tuesday, March 17, 2015

March Playtime with Veronica


Hi Veronica here today to share with you a layout I created using photos I had of my nephew.  He was such a cute baby.

I used the frog theme because the park we would take the kids to was called Polliwog Park.


I used the LSS spring butterflies, dragonfly, and the Moroccan border chipboard


I also used the pack of LSS "12 months".  I painted my chipboard yellow then decided to paint over it with my zig painty pen


Thank you for stopping by today, happy scrapping ...


Leaky Shed Studio Product Used:


Tuesday, December 23, 2014

BoBunny and Leaky Shed Studio Team Up - Fa La La


It's Veronica here and just want to say that I am definitely in the mood for Christmas.  My Christmas tree is up, my presents are wrapped and yes, my cards are sent.  

I really enjoyed making this layout with BoBunny and I loved using BoBunny's new products especially their new glitter paste. Today I am excited to share a layout I created for our SWAP using Leaky Shed Studio's Poinsettia Corner  and also the Moroccan Border Chipboard.  I chose the BoBunny Christmas Collage Collection for my layout. 


The BoBunny Christmas Collage Collection inspired me to make a layout with a shabby vintage feel to it.


I used BoBunny's glitter paste, and copics to make my Poinsettia Chipboard shine


I stenciled some Art Anthology paint and painted my Moroccan Border with shades of brown to match my stencil pattern.  Then I used lots of BoBunny glitter gold paste and sprayed some silver mist on my page


I also added the gold glitter paste to my flowers.  Does it show I really LOVE the BoBunny glitter paste?


To give my layout that vintage shabby look, I distressed my paper


I hope you enjoyed my layout as much as I enjoyed creating it.

Happy Scrapping and dont forget to leave us a comment and like our FB page.

:) Veronica (kitsnbitscraps)

Leaky Shed Studio Product Used:
Poinsettia Corner
Moroccan Border


BoBunny has generously provided this fabulous give-away package for one of our fortunate followers. 


****
To be eligible to win you need to do the following:  

Leave a comment on each Leaky Shed Studio Facebook Page Post during the swap, December 9 to 31. You have until midnight EST on January 3rd to leave your comments. 

The randomly selected winner will be announced on January 5th, 2015.  Be sure to check out our links for more inspiration from our talented team.

****
BoBunny is also giving away a Prize Pack so for a chance to win a fabulous Leaky Shed Studio chipboard prize package, stop on by the BoBunny blog for all the details.

Friday, October 10, 2014

What is an Ornithopter with DT Guest Daphna Barbalat


Hi! Daphna Barbalat here and I’m so excited to be a Guest Designer for Leaky Shed Studio today.
 
There are so many great chipboard shapes to choose from at Leaky Shed Studio, it was so fun looking through all of them but when I saw the Ornithopter I just knew I had to make a layout.
 
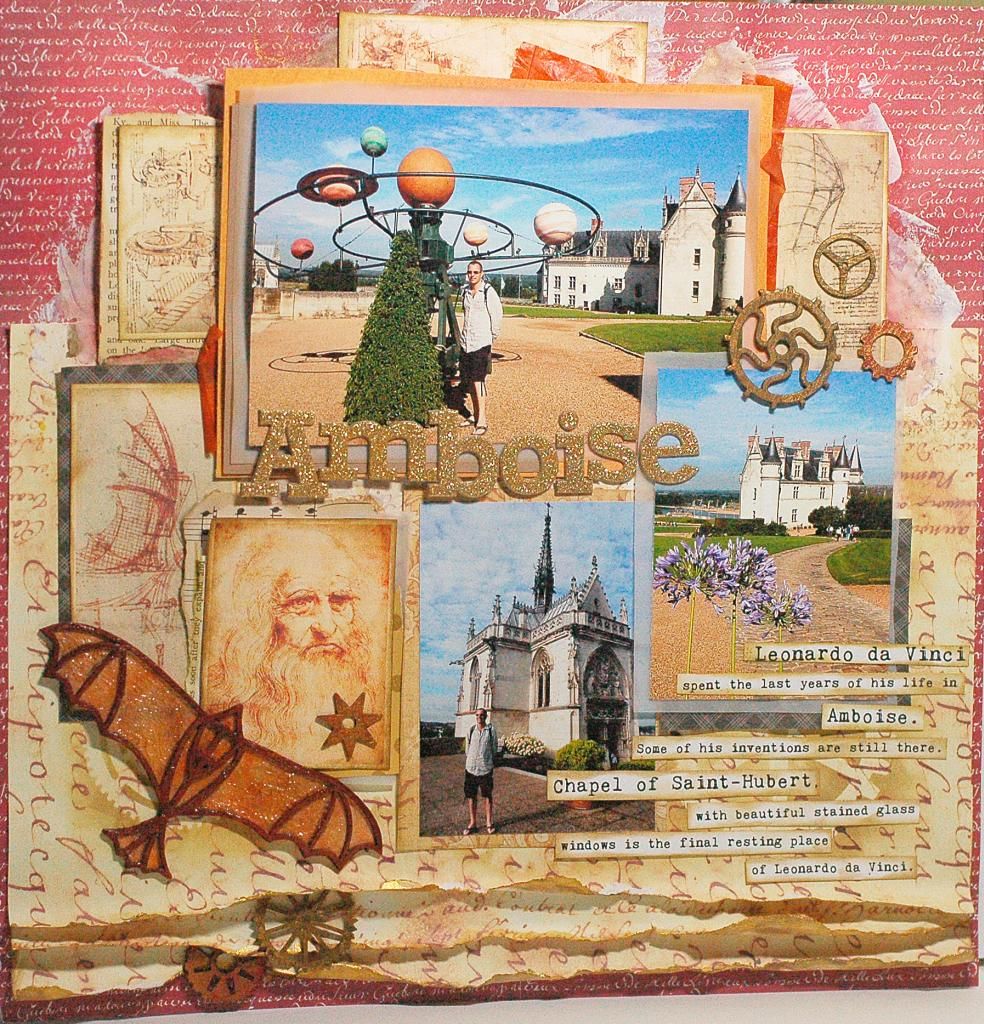
The LSS chipboard Ornithopter reminded me of a design by Da Vinci and I thought it would look perfect on a layout to document our recent trip to France.  While in France we visited Amboise, the village that Da Vinci Spent the last years of his life and where he is buried.


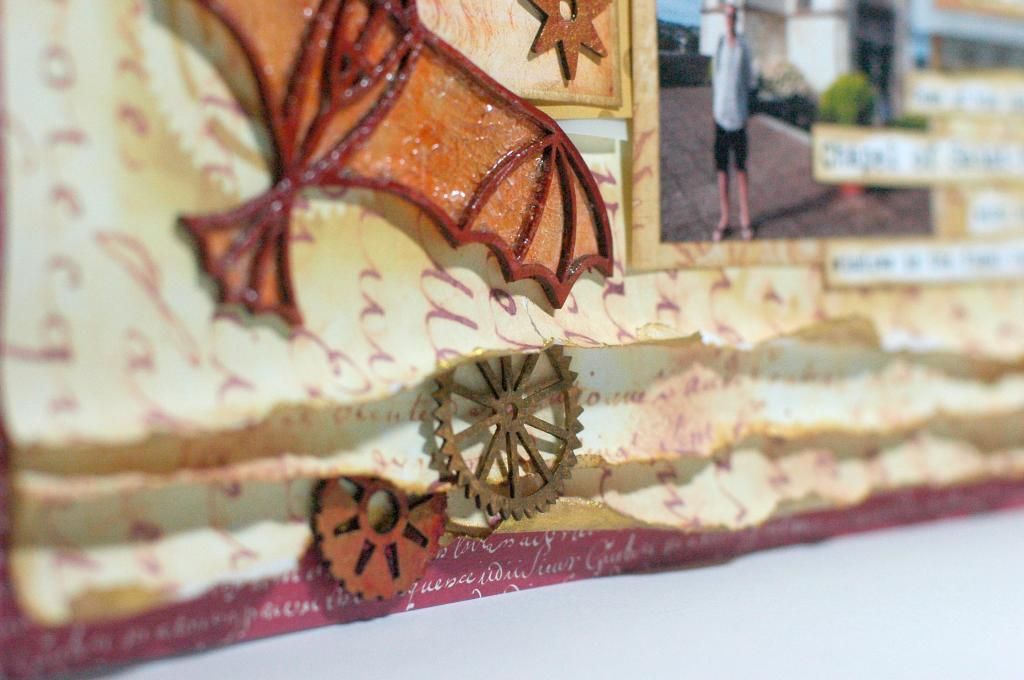
I stared by painting the Ornithopter then I glued some painted tissue paper to the back. I used clear Tim Holtz Crackle paint, giving it a aged antique look. I also used the watch parts, which I painted in metallic gold and copper paint.


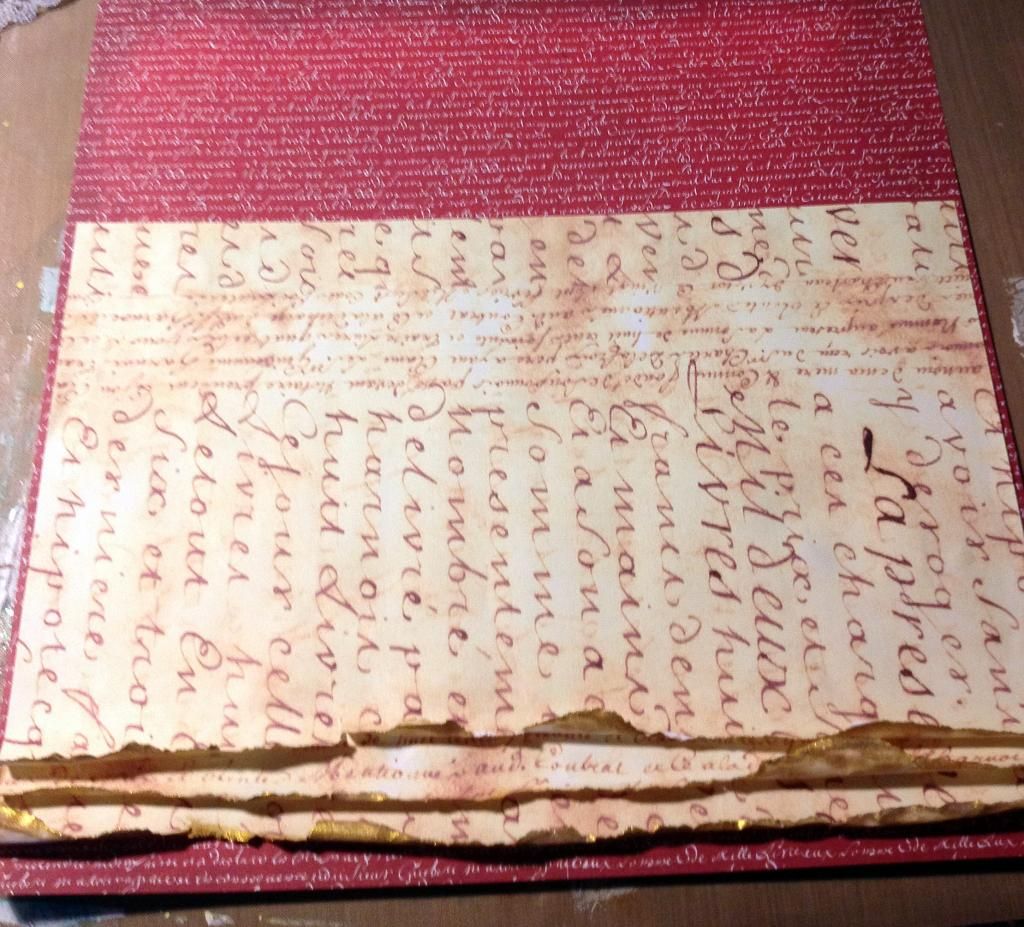
For my base layout I chose antique looking script paper that I tore on the bottom edge, I  layered three pieces that I edged without paint. These were again layered on red script paper. I added gesso, glimmer mist and stenciling with Distress ink.


I found some great images of Da Vinci and his amazing sketches online and printed them out to use on my layout. Everything was layered with vellum and book paper, I tucked some gears into the layers of paper giving lots of texture and interest to the page.


I enjoyed sharing my trip to France with you and Leaky Shed Studio, thank you for stopping by.


Leaky Shed Studio Product Used:

Tuesday, September 23, 2014

Boy Meets Duck with Veronica Johnson


Hi, Veronica here today to share with you a page I did of my nephew.  He was the cutest baby.  This photo was taken in our neighborhood playground.


Who says you can't use flowers on a Boy page?  I don't see the problem.  All you have to do is add some Leaky Shed Studio chipboard gears, use some brown and gold tones and you are set.


Since my nephew was playing outside I went ahead and used the LSS bird chippie.  I think this bird is so cute and versatile.  I do plan on getting some more LSS birds in the future.  If you are looking to buy some Leaky Shed Studio chipboard and your Local Store doesn't have it you can also go to scrapbook.com and purchase.

I also spelled out the word B O Y using the Leaky Shed Studio Alphabet.  The size is perfect and there are so many ways to alter the chipboard and get any look you want.


Thank you for stopping by and letting me share my projects and memories with you.  I cherish this photo of my nephew, he is all grown up now.  But I still remember this day like it was yesterday.

For techniques of how I altered my chippies and built my page - please stop by my blog: Kitsnbitscraps.

Happy scrapping ...


Leaky Shed Studio Product Used:

Thursday, July 10, 2014

Reflections of Paris with Veronica and Altered Pages Partner Card by Trisha Neal

Please scroll down to see today's Altered Pages Partnership project.

~ ~ ~ ~ ~ ~ ~ ~ ~ ~ ~ ~ ~ ~ ~ ~ ~ ~ ~ ~ ~ ~ ~ ~ ~ ~ ~ ~ ~ ~


Hi, Veronica here today to share with you a layout of my daughter Vanessa and her long time high school friend Kristen.

I used the following Leaky Shed Studio chipboard to make my layout.

  
My first step was to prepare my chipboard ...
 
I first painted them with gesso to get an even base.


I then painted the pieces with my markers.  Then after it was dry I added a layer of Art Anthology sorbet to give the pieces a bit of shine and glitter.


Next I picked out my embellishments with the color scheme of black and yellow that I had chosen


I finished off my layout with a stamped and embossed word "reflections"


Thank you for stopping by and I hope to have inspired you to add some Leaky Shed Studio chippies to your stash. Chipboard looks great on a layout especially with the large themes that Leaky Shed Studio carries you will find something that enhances your layout.

Happy Scrapping, Veronica (Kitsnbitscraps)


Leaky Shed Products Used:
Circle Arch Doily

~ ~ ~ ~ ~ ~ ~ ~ ~ ~ ~ ~ ~ ~ ~ ~ ~

Now for our Altered Pages Partner Project.


 What gorgeous colors and textures in this book by Altered Pages Designer Trisha Neal.

"I Am Free"

Leaky Shed Studio Products

More details and a listing of Altered Pages products
can be found HERE.

Thanks for stopping by!

Tuesday, June 10, 2014

Shopping with Leaky Shed Flourish and Veronica


Hi Veronica here to share a layout of my daughter Vanessa shopping at the market place. I started off with these 3 Leaky Shed Studio chippies below.

I first thing I did was add gesso to all three.  I like putting down gesso as my base because then my color will not get absorbed by the chipboard and also the gesso with give my color some tooth to hold on to.


Flourish #2 (6080)


Spring Dragonfly (6081)


Damask
 
 
So first I want to show you the process of preparing my chipboards for my layout.
 
FLOURISH #2
 
After adding the gesso, I added some vegas gold sorbet from Art Anthology.  Then I added crackle paint from Ranger.  After it was crackled and dry I added touches of tigers eye sorbet on top.


SPRING DRAGONFLY
 
On the dragonflies I first sprayed blue colorations on to the wings.  Then I added green sorbets to the tips of the wings and to the body.  After drying, I added a touch of tigers eye sorbet paint to upper body.


When I got the colors I wanted I dipped the dragonflies in clear embossing powder.  Then I put jewels on the body as my finishing touch.


DAMASK
 
My first process after the gesso was to add vegas gold to the entire damask.  Then I added touches of tuxedo sorbet to the chipboard.


Then I embossed the chippie ...
 

Last I added gold glitter ...


 I always pick out my chippies first.  That starts me thinking about what kind of layout I want.  Then I pick the colors.

I did lots of distressing and layering on this layout.  My daughter Vanessa had gone to Paris and she was shopping at the market place. 


I hope I have inspired you to try out some Leaky Shed Studio chipboard.  
 
Happy Scrapping, Veronica (Kitsnbitscraps)


Leaky Shed Products Used:
Damask (new item)
Flourish #2 (6080)
Spring Dragonfly (6081)