Hi!
Daphna Barbalat here and I’m so excited to be a Guest Designer for Leaky Shed
Studio today.
There are so many great chipboard shapes to choose
from at Leaky Shed Studio, it was so fun looking through all of them but when I saw the Ornithopter
I just knew I had to make a layout.
The LSS chipboard Ornithopter reminded me of a design by Da Vinci and I
thought it would look perfect on a layout to document our recent trip to France. While in France we
visited Amboise, the village that Da Vinci Spent the last years of his life and
where he is buried.
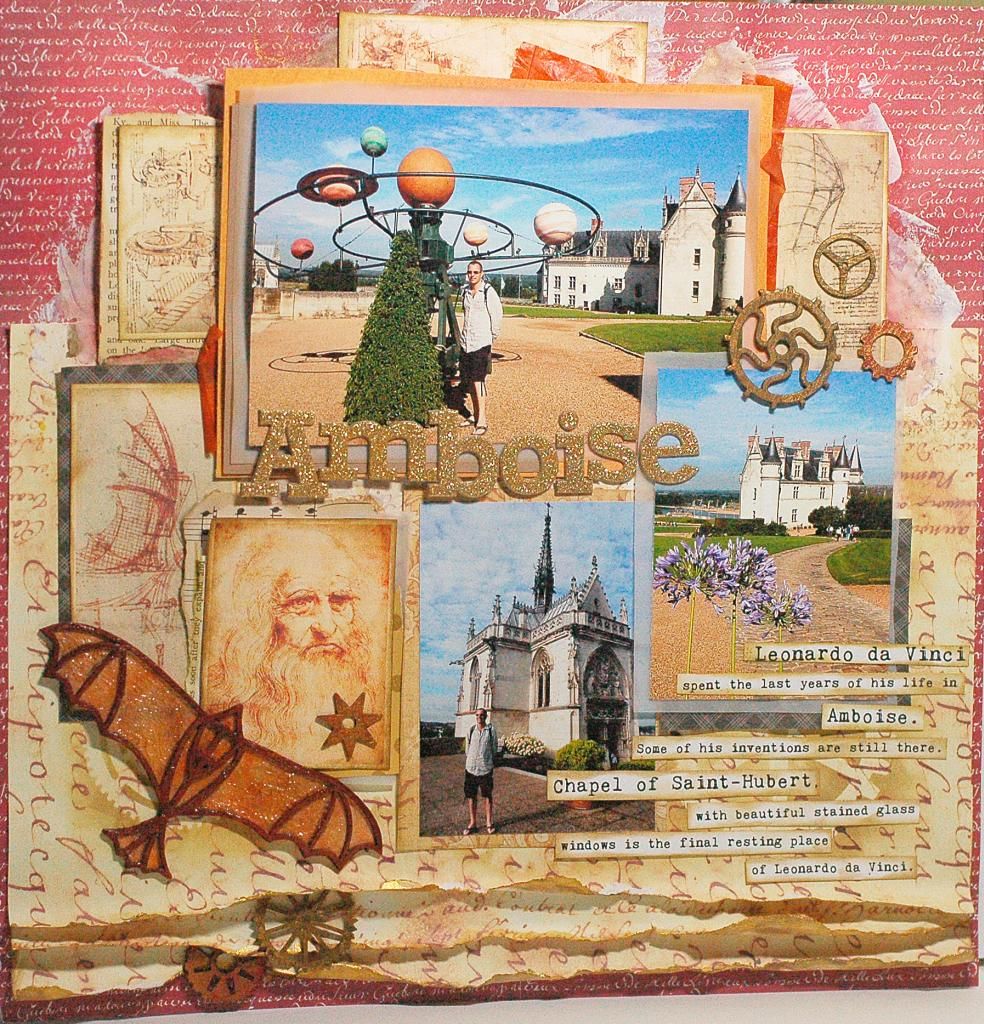
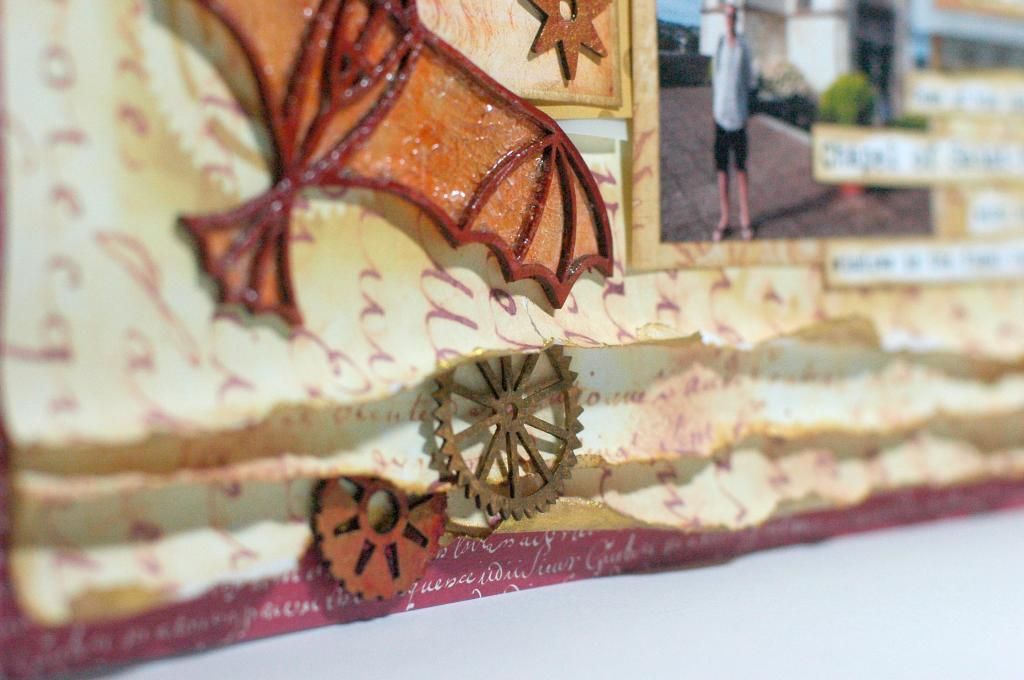
I
stared by painting the Ornithopter then I glued some painted tissue paper to
the back. I used clear Tim Holtz Crackle paint, giving it a aged antique look.
I also used the watch parts, which I painted in metallic gold and copper paint.

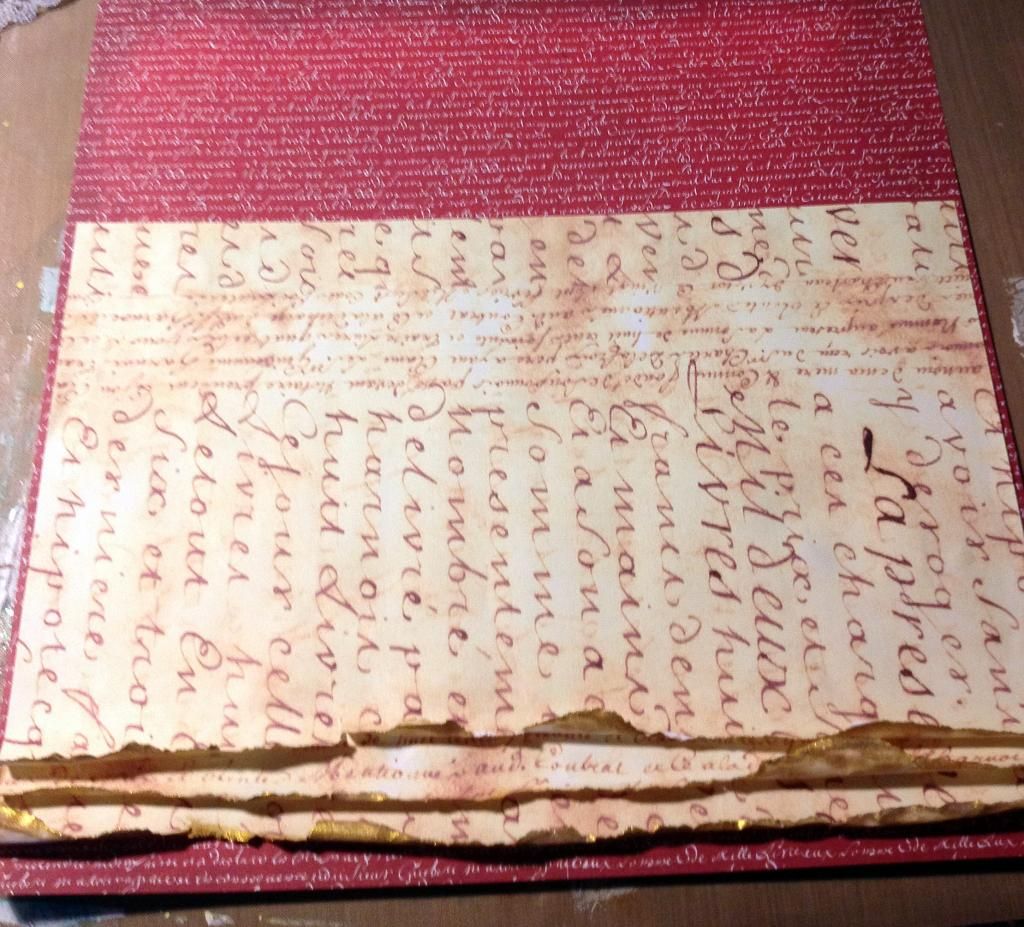
For
my base layout I chose antique looking script paper that I tore on the bottom edge,
I layered three pieces that I edged without paint. These were again
layered on red script paper. I added gesso, glimmer mist and stenciling with
Distress ink.

I
found some great images of Da Vinci and his amazing sketches online and printed
them out to use on my layout. Everything was layered with vellum and book
paper, I tucked some gears into the layers of paper giving lots of texture and
interest to the page.
I enjoyed sharing my trip to France with you and Leaky Shed Studio, thank you for stopping by.

Leaky Shed Studio Product Used:


