Thursday, October 30, 2014

Boo To You Banner Up


Hi, Veronica here today to share my Halloween Banner.  I used the Leaky Shed Studio Banner and the chipboard "old house".  The banner comes with 3 banners in a pack, so I thought I would add the word BOO.


I knew that I wanted to make a banner and last year I saw this idea for a banner at a restaurant. Anyway I thought the candy corn idea was adorable.  In order to make my banner longer I added the haunted house and a moon that I cut out.


I added Art Anthology sorbet paint to my chipboard.  Then I brushed it out with water.  I wanted the details to show on the chipboard itself.


I then embossed my chipboard with clear embossing powder.  I really like the texture and shine of chipboard with embossing powder.


Next I added pattern paper to the tops of my banner


This banner was fun to make and it will look great for Halloween.  You can make these banners out of any theme you wish and they are the perfect size.


Happy Halloween, thank you for stopping by.  I hope I have inspired you to try some home decor with Leaky Shed Studio.


Leaky Shed Studio Product Used:

Tuesday, October 28, 2014

Best Day Ever with Leaky Shed Designs


Welcome to the Leaky Shed blog!  We are so happy you are here.  It's Cathy hosting the blog today and I have a layout to share with you using two of Leaky Shed's gorgeous chipboard designs. I love that Leaky Shed's designs are easy to layer...something us scrapbookers love.  I chalked the Large Ring Frame with grey and black chalk and then add just a bit of water to my applicator to blend.  The frame was the perfect accent and additional layer to put behind my photo.  Love the intricate designs of this frame. It added   interest and detail to the layout. 
Next, I chalked the new Fern flourish with gold chalk and blended just a bit with water too!  All I had to do was wait for it to dry and layer over my photo.


Thanks again for joining us at Leaky Shed, and I hope you will try layering some of Leaky Shed Designs on your layouts and cards!
~Cathy


Saturday, October 25, 2014

an Autumn necklace and a butterfly canvas

Today, my bloggy friends, you get two chippy projects for the price of one visit:

Just look at the Leaky Shed Studio Autumn Leaf Crown--isn't it gorgeous? (Just so you know, anything bold print is a link.)
While this is obviously perfect for some lovely fall and harvest themed layouts and cards, it immediately made me think of a necklace--it's 4 inches across, a perfect size:
Leaky Shed chipboard colors up fabulously with chalks!!!

Add some pearly and metallic chalks, a chain, and some charms--voila!  A pretty autumn pendant.


Also, I recently did a 6x6 canvas for my column at Unruly Paper Arts, a painty piece featuring the Leaky Shed Studio Large Ring Frame.  However,  I want to give it to my aunt, who loves butterflies, so I added the Large Spring Butterfly and two of the Small Spring Butterflies (they come in a three pack):

Have a happy, creative Saturday, everyone!
:)trisha

Tuesday, October 21, 2014

A beachy and warm layout!

Hi everyone!

I am excited to show yo my new layout from Leaky Shed!!!

My family and I love the beach and we spend a lot of time over the summer there!
I was really happy to see a fabulous sandcastle available through Leaky Shed!


This is my youngest son.....he loves to wade in the water....


I used the fabulous sand castle!  What is really neat it is cut out of sand paper!
Feels like beach sand and looks like it belongs on the beach!

I added a little gesso to add a little more visual interest!

Here are a few more details....


Thanks for stopping by and have a wonderful day

Leaky Shed product used:

Thursday, October 16, 2014

Girlie Grunge Birthday Card by Tracey Sabella

Hi everyone. It's Tracey here to share a girlie grunge birthday card featuring Leaky Shed Studio chipboard. Maria's favorite color is purple, but she's not a girlie girl, so I had fun including grunged up gears from the Watch Parts collection.

Birthday Card

Tips and Techniques
These Watch Parts are painted black, then dry brushed with metallic berry paint. I also used a small Watch Part in the center of my focal flower.

Here's another view. I mixed plum and gold Glimmer Mist to brush over the flowers to add some shimmer.

This is half of a Flower Corner. I started by brushing the flourish with clear gesso and flowers with white gesso. I then layered on different colors of mist. Mist is a form of water color and will reactivate when rewetted, so to keep the colors clear, I misted with Helmar Clear Kote Matte Varnish between layers.

I colored this sweet Spring Dragonfly with Perfect Pearls, then added Sugar Shimmer Twinkle Dust Glitter to the wings. 

The background was misted in plum then splattered with grey and black. Again, I misted with clear varnish between colors.

LSS Products
Flower Corner
Spring Dragonfly (3 in package – smallest used)

A full product list can be found on my blog, Garden of Grace.

Thanks for stopping by today!

Tuesday, October 14, 2014

Disney Pocket Page

I love all the great Disney themed pieces that Leaky Shed has and today I am going to share how I used them on a pocket page layout!   Christine joining you today with some more Disney inspiration!

I love pocket pages because they leave lots of room for you to be as creative as you want to be or have time to be - you can go big or go simple  Today I added lots of personal touches to mine.

For my title pocket I used both Memories with Ears and the Mouse Frames to make it personal and have some awesome dimension that chipboard provides.

I also thought it would be fun to create a shaker pocket using the bigger sized Mouse Frame and some coordinating sequins.  I glued the frame to the back of the pocket page.  The shaker box is going to be visible on both sides of the pocket page so that means the back side gets to be Disney too!

Have you made anything with the Leaky Shed Disney pieces? We would love to see them on facebook!


Saturday, October 11, 2014

Alice in Wonderland--an altered book

Have you seen the new Alice themed chips from Leaky Shed Studio?  I've been working on an altered book using them . . .
White Rabbit link   
"Oh my ears and whiskers, how late it's getting!"
Watch Parts link
the pocket watch image is a pop-up
The cover of the book features a niche filled with Alice related items, surrounded by the beautiful Leaky Shed Victorian Mirror Frame (link):

There are a few more details and pics on my blog (link), and I'll be sharing more layouts as the book progresses--have a wonderful weekend, everyone!  

:)trisha

Friday, October 10, 2014

What is an Ornithopter with DT Guest Daphna Barbalat


Hi! Daphna Barbalat here and I’m so excited to be a Guest Designer for Leaky Shed Studio today.
 
There are so many great chipboard shapes to choose from at Leaky Shed Studio, it was so fun looking through all of them but when I saw the Ornithopter I just knew I had to make a layout.
 
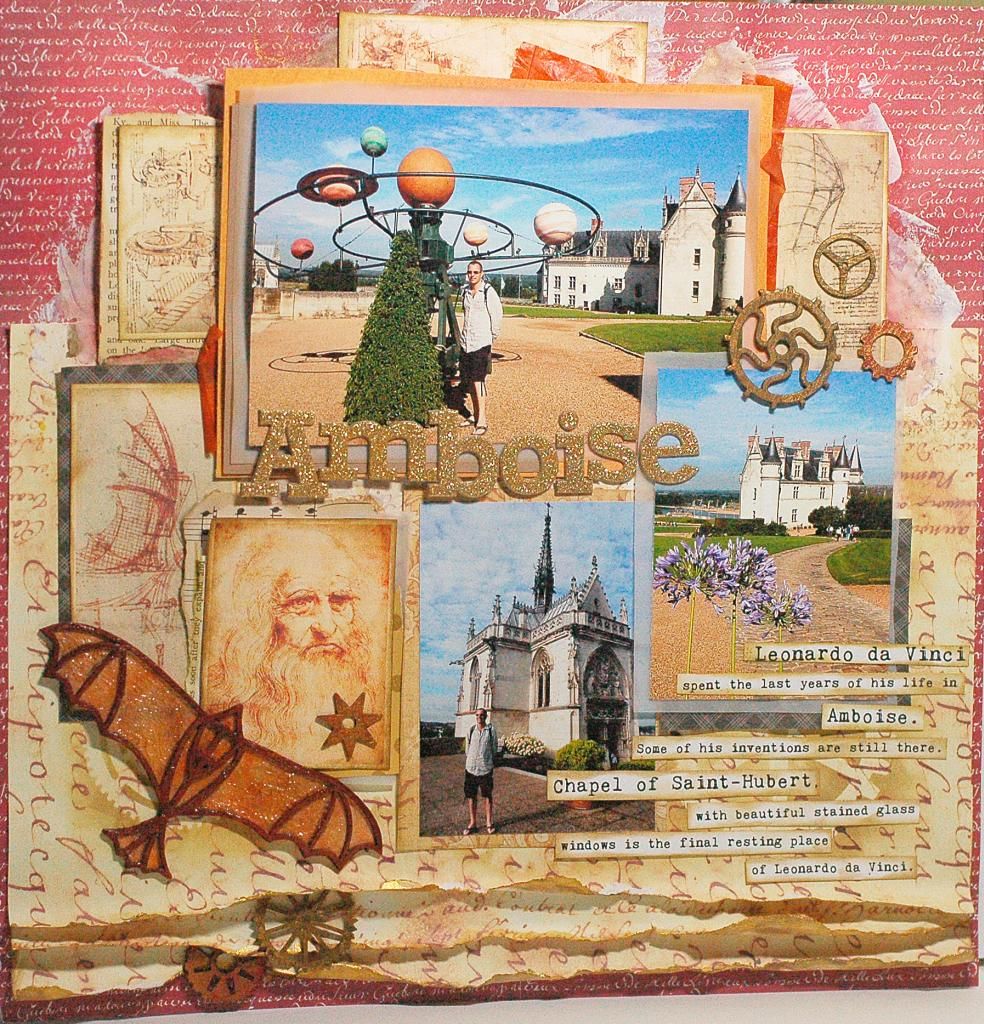
The LSS chipboard Ornithopter reminded me of a design by Da Vinci and I thought it would look perfect on a layout to document our recent trip to France.  While in France we visited Amboise, the village that Da Vinci Spent the last years of his life and where he is buried.


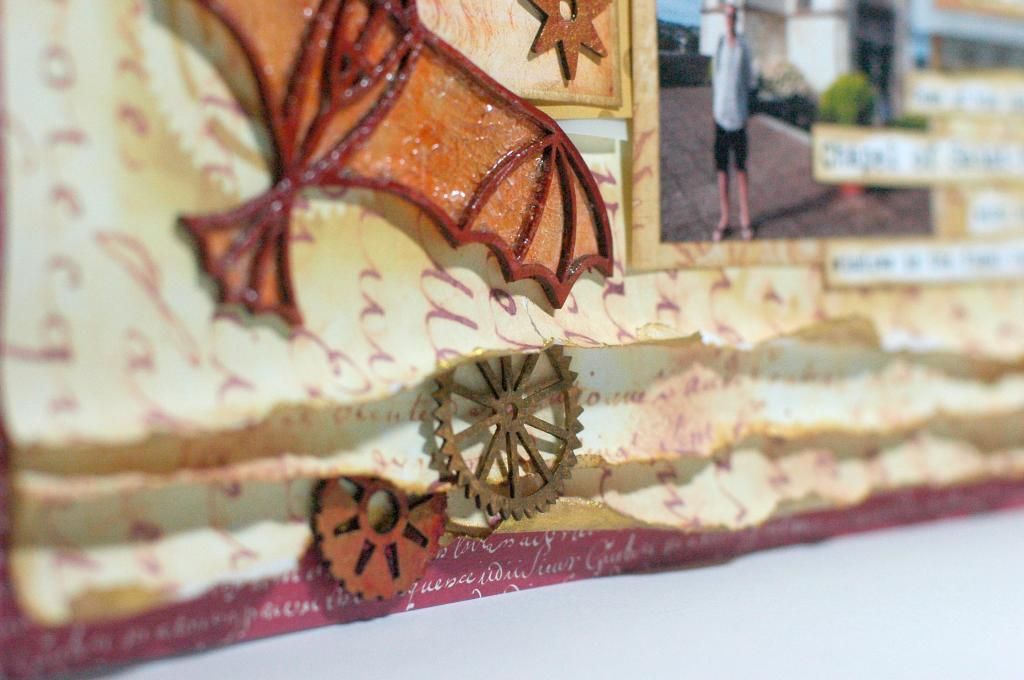
I stared by painting the Ornithopter then I glued some painted tissue paper to the back. I used clear Tim Holtz Crackle paint, giving it a aged antique look. I also used the watch parts, which I painted in metallic gold and copper paint.


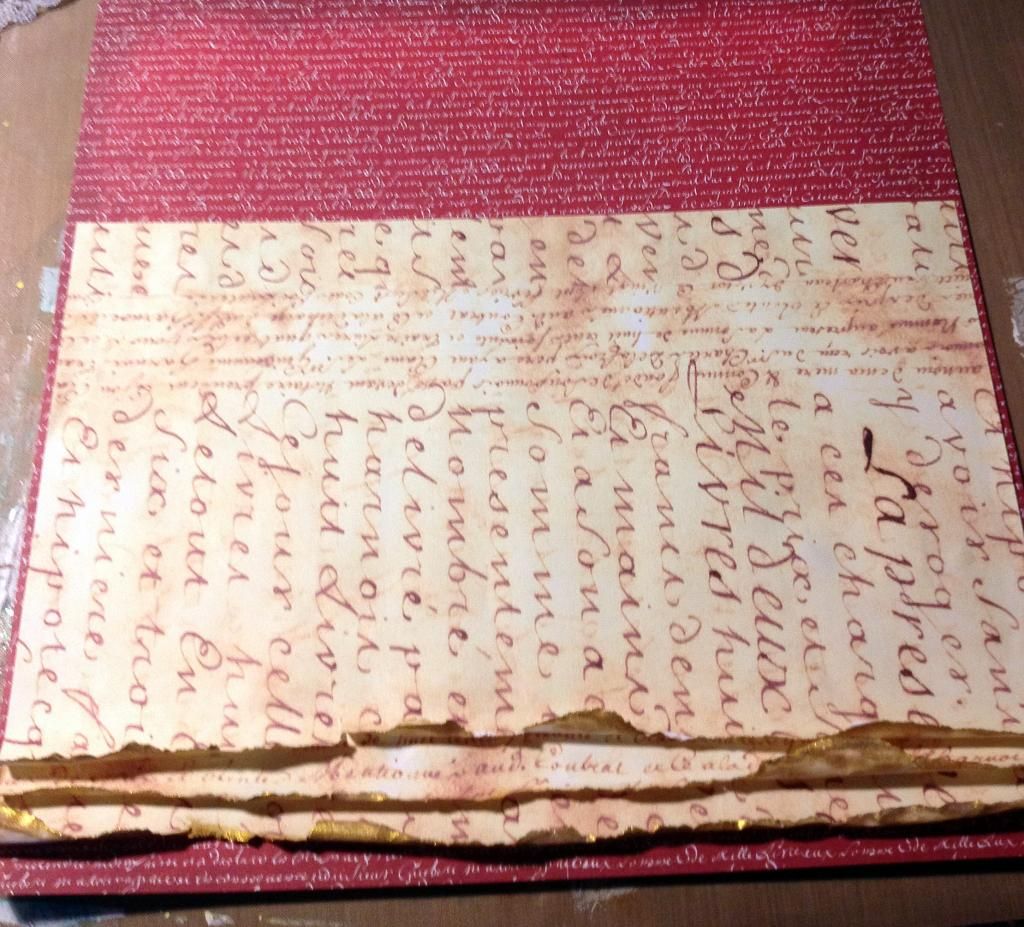
For my base layout I chose antique looking script paper that I tore on the bottom edge, I  layered three pieces that I edged without paint. These were again layered on red script paper. I added gesso, glimmer mist and stenciling with Distress ink.


I found some great images of Da Vinci and his amazing sketches online and printed them out to use on my layout. Everything was layered with vellum and book paper, I tucked some gears into the layers of paper giving lots of texture and interest to the page.


I enjoyed sharing my trip to France with you and Leaky Shed Studio, thank you for stopping by.


Leaky Shed Studio Product Used:

Thursday, October 9, 2014

Happy Halloween with Leaky Shed


I love Halloween paper crafting...it's my favorite time of year to create with paper.  I love the colors, patterns and all of the awesome embellishments!  It's just the simply the best!
I love the Leaky Shed Picket Fence, it's awesome as a border or to cut up and used for cards.  I still had a piece left from another card I created for Leaky Shed and I knew it would be the perfect embellishment for my spooky little treat bag.  It was the finishing touch I was looking for with my Haunted House, it just really sets it off.
I added just a bit of Vintage Photo Distress Ink to it and then adhered it to the bag!


Wishing you all a Happy Halloween Paper Crafting Season!
~Cathy

Tuesday, October 7, 2014

Time Well Spent

Good morning everyone!
I hope you are all having a wonderful week!

Today I get to share a layout I created using the fabulous Clock chippie!


I don't know about everyone else but for me anytime spent with my family is time well spent!


I used the clock to frame my photo!
To create the look - I painted the chippie with gesso, then I used my purple gelato over a few areas, then I sprayed with Bodacious Blush mist from Lindy's then added a little more gesso


I kept the hands from the clock to use as an accent in my corner cluster!


I love to cluster!


and I love dimension!

Thanks for stopping by!


Leaky Shed Studio Materials used: